Hi everyone,
I’m Daniel, a newcomer to OpenMRS, and I am eager to contribute to the community. Recently, I tried to deploy the OpenMRS backend and frontend locally. To be honest, I ran into some problems that took me a while to figure out. Fortunately, I finally set it up successfully!
I want to share my steps. I couldn’t find a single document that clearly teaches how to set up everything end-to-end (E2E) locally; the information seems scattered across different docs. I wrote this to save time for other beginners like me. I also want to check with experienced contributors to see if my steps are correct or if there is a simpler way.
In this tutorial, I will show you how to:
- Set up the backend (
openmrs-core). - Enable the REST and FHIR2 modules.
- Set up a frontend app (
openmrs-esm-patient-management).
So, let’s start!
0. Environment
- OS: macOS (M4)
- Java Version: 11
- Tools needed: git, yarn, Maven (
mvn), Docker
1. Backend setup
In this phase, we will set up the backend and connect it to a PostgreSQL database running on Docker. Then, we will add two modules (REST and FHIR2).
1.1 clone openmrs-core repo
git clone git@github.com:openmrs/openmrs-core.git

cd openmrs-core.git
1.2 Build the package
Make sure you are using Java 11. Follow the readme.md to build it. You can skip the tests to save time:
# you can skip the test
./mvnw clean package -Dmaven.test.skip=true
After it builds successfully, run the server:
cd webapp
../mvnw jetty:run
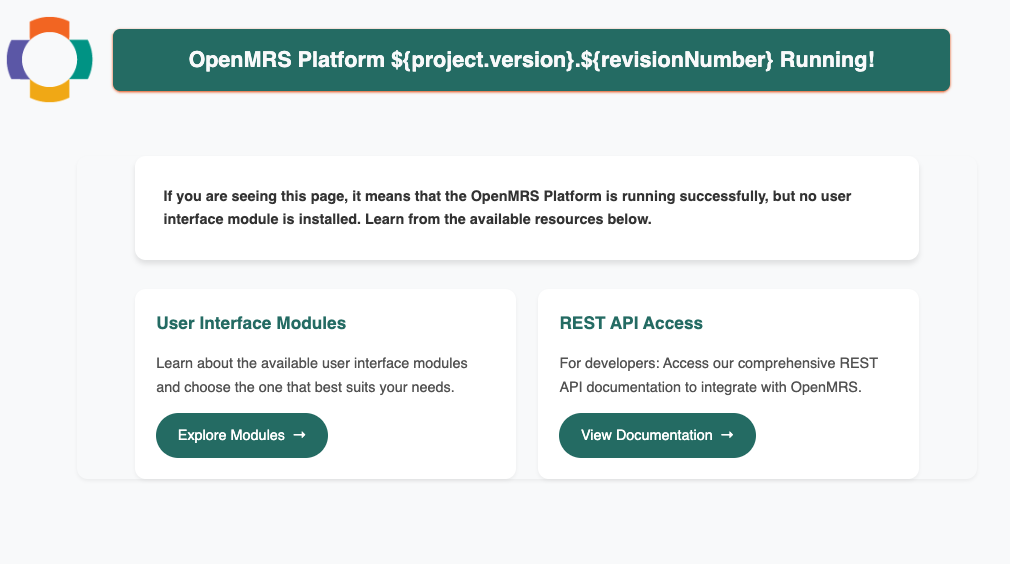
Now you can access http://localhost:8080. Follow the UI setup steps and select “Simple mode”. You will need to connect to MySQL or PostgreSQL. I chose PostgreSQL. Before clicking continue, we need to create the database using Docker.
1.3. create PGSQL docker container
 docker run -d \
  --name postgres-openmrs \
  -e POSTGRES_PASSWORD=openmrs \
  -p 5432:5432 \
  postgres:14.5
After the container starts successfully, restart Jetty (press Ctrl+C, then run ../mvnw jetty:run again).
Refresh the web page, choose PostgreSQL as your database, and type openmrs as the password. Click Continue and confirm.
Finally, you will see a webpage saying: “If you are seeing this page, it means that the OpenMRS Platform is running successfully…”
1.4 Load rest and fhir2 modules
Our frontend needs these modules to access the backend data.
- Download them from AddOns
- Search for Rest Web Services (select version 3.1.0) and FHIR2 (select version 2.8.0).
- Put the downloaded
.omodfiles into this folder:~/.OpenMRS/modules
Restart Jetty again. Test if it works by running this curl command in a new terminal:
curl -u admin:Admin123 "http://localhost:8080/openmrs/ws/fhir2/R4/Location?_count=1"
If you see a JSON response starting with {"resourceType":"Bundle"..., the backend is set up successfully!
2. Frontend setup
I only set up the openmrs-esm-patient-management app. You can set up other frontend apps the same way.
2.1 clone the repo and install package
git clone https://github.com/openmrs/openmrs-esm-patient-management.git
cd openmrs-esm-patient-management
yarn install
2.2 setup the webapp
yarn start --sources 'packages/esm-*-app' --backend http://localhost:8080
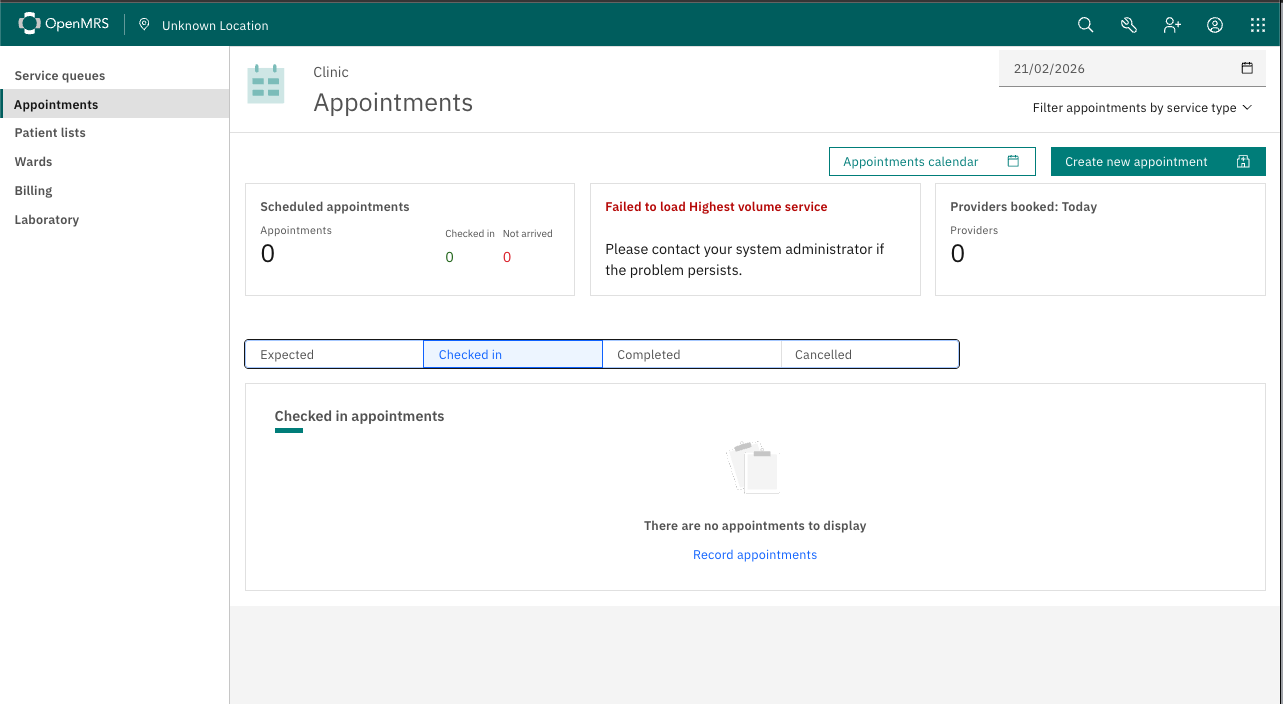
Access http://localhost:8081/openmrs. Log in with the account admin and password Admin123.
Finally! We can see the webpage. However, when I click “Service Queues”, I get an error. I guess it is because I need to set up or load some other apps. Anyway, I think we are on the right track!